

Basic Functions
Basic Functions
1. The archive:
When you work with heavy files such as. video, flash, audio and PowerPoint, these files are uploaded to file archive before they can be used in LiveConnect CDS. File Manager allows you to organize your files into folders, and then pick them out and use them in one or more playlists.
File Manager is accessed by clicking on the tab "Archive" at the top of LiveConnect CDS Administration System.
2. Folders:
All files in the file archive organized into folders that can be structured in several levels. You can even determine what folders will be named and it is possible to create subfolders.
To create a new folder, you can:
- Select "Archive" in the tab.
- Select "Create folder".
- Enter the folder name in the field "Name".
- Select the folder will be created on the "first level" or another folder in the "Location".
- Click on "Create Folder".
- The folder is now created and you can begin uploading files to it.
otherwise:
Select "Create Folder" in the upper right corner.
To view the contents of a folder, click "Archive" and then tap the box "Folders". To modify an existing folder, you must first select the folder, and then click on "Edit Folder" box "Tools" found in the right corner. You will now have the opportunity to enter a new name and flyte folder to another location.
3. Uploading files:
To upload a file to a folder, do the following:
- Select the folder you want to upload to the box "Folders".
- Click "Browse" and locate the file you want to upload to your computer. Would you like to upload more files, simply click on the next "Browse" button and find a new file. Can upload up to 10 files simultaneously.
- Click on "Start Download".
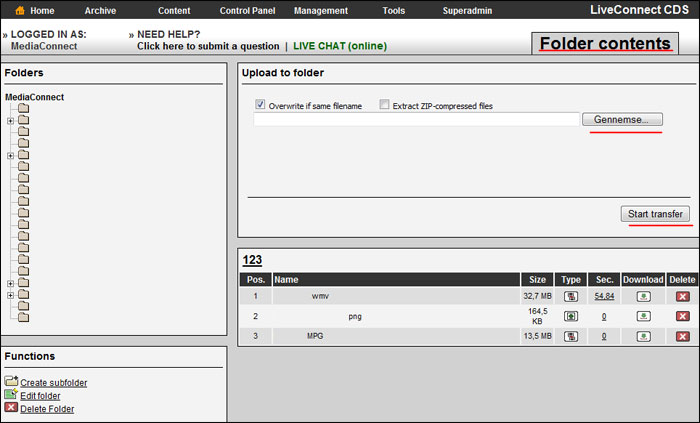
4. File Options:
When downloading a file from the file archive, it can sometimes be useful to the system by the time the contents of the file items, so the system can estimate the duration of the playlist.
Some files, the system can even read duration - this applies in particular pictures as well as Windows Media Video / Audio (WMV / WMA). For other files, the duration set manually - this applies in particular Files of type Flash (SWF) Mpeg video (PG), and MS PowerPoint (PPT).
For those files where the system can not determine a duration can be indicated by clicking the second century column in "Sec" next to the file. This results in an input field where you can specify the file's length in seconds.
5. Contents:
The LiveConnect CDS grouped all the content in content channels, which contains everything one player PC need to run your screen show.
A content channel consists of the following:
- One or more playlists.
- The media to be played on the screen.
- Schedule.
- Information about screen sharing (layers).
- On / Off control on screen.
To gain access to work with content channels, click on the tab "Content" at the top of the screen.
6. Create content channel:
When you create a new content channel will automatically be placed in the root of the box "Content Channel". If you have many content channel may for clarity be an advantage to group them into folders.
These are created using the "Create Folder" option in "Content" tab.
To create a new empty content channel do the following:
- Hold your mouse over the tab "Content" at the top of the screen.
- Choose "Create channel".
- Enter the name of the channel content in the "Name".
- Select the content channel to be placed in a folder in the "Level".
- Create content channel by clicking the "Save".
7. Playlists - Display Screen or Info Kiosk?
A playlist is a list of which media to be displayed on screen and in what order they must be phased in.
The LiveConnect CDS you can work with 2 different types of playlists:
-
- Display Screen
- Infokiosk
Display screen is used if your monitor must be running a continuous screen show where users are unable to affect the show. (eg. via. a mouse or touch screen).
Info Kiosk list is used in cases where you want to use LiveConnect CDS opportunities to work with interactive content where the user can influence the content via. a navigation tool like a mouse or a touch-sensitive "touch screen".
Info Kiosk list settles not the media constantly, switching only when the user clicks on a link or menu button. If the monitor has not been in use for a given period, info kiosk play list set to display a second display screen play list until a user activates the navigation tool.
Info Kiosk list is typically used for running Web kiosks or with media type "Info Kiosk page."
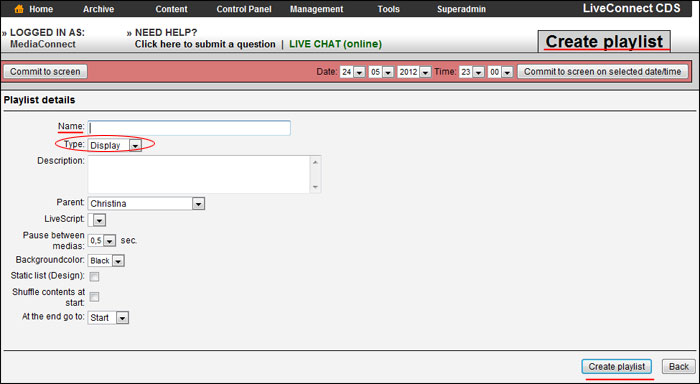
8. Create Playlist "Display Screen":
To create a playlist of the "Display Screen" must do the following:
-
- Select the content channel you want to create the playlist in the tab "Content" box and select "Content Channels".
- Click the "Create channel" in the "Functions".
- Enter the desired name in the "Name".
- Vælg "Display" i feltet "Type".
- Click on "Create Playlist".
9.Create Playlist "Info Kiosk":
To create a playlist of the "Info Kiosk" should do the following:
- Select the content channel you want to create the playlist in the box, "Content Channels".
- Click the "Create Playlist" in the menu.
- Enter the desired name in the "Name".
- Select "Info Kiosk" in the "Type".
- Click on "Create Playlist".
The playlist will now be created and you can begin to add media to it.
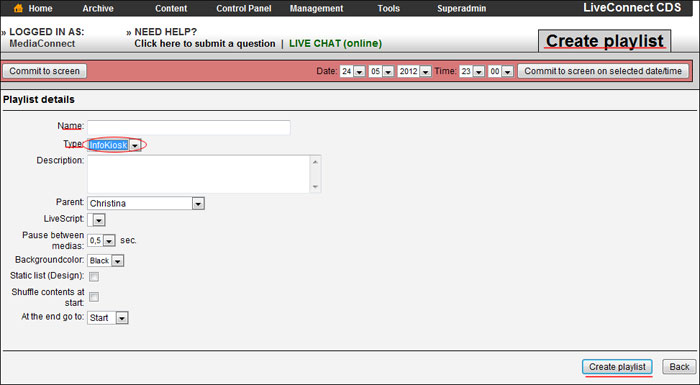
NB.: Playlists such as "Info Kiosk" settles NOT the media constantly, but only via. interactivity from the user. Info Kiosk list is especially suitable for media types with interactive menus like. "Info Kiosk page", "Website" or "Flash".
To add a video show, which is activated when there has been no user input for a period, do the following:
- Click on "View" next to the current playlist in the main window.
- All screens show settings edited from the box "Show."
- Select the playlist you want to start in the box "Select Playlist".
- Check the "Start after".
- Enter how many seconds must elapse before the screen the show starts, and click "Save."
Screen show will now start after the number of seconds you entered. When the user moves the scroll gear connected to the screen will display the show disappear and kiosk component appears.
To gain access to work with content channels, click on the tab "Content" at the top of the screen.